Showing posts with label tutorials. Show all posts

Monday, May 14, 2012

DIY: Cosmic Galaxy Dress


I am in love with the cosmic galaxy print that has been all over the fashion universe lately. So I decided to take an old dress and make it myself! Heres a few photos and the tutorial video at the end..


Wednesday, March 7, 2012

Cosmos

I've been obsessed with anything cosmic lately. From fashion, to beauty, to art, inspiration is popping up all over influenced by galactic designs.

The cosmos is very inspiring in itself, to think that there are endless possibilities out there as you gaze up into the darkness. There's so much that you will never know...leading so much to the imagination.

Designer Christopher Kane has created a print collection that defines the cosmos in clothing. I am absolutely in love with some of the dresses he's created.


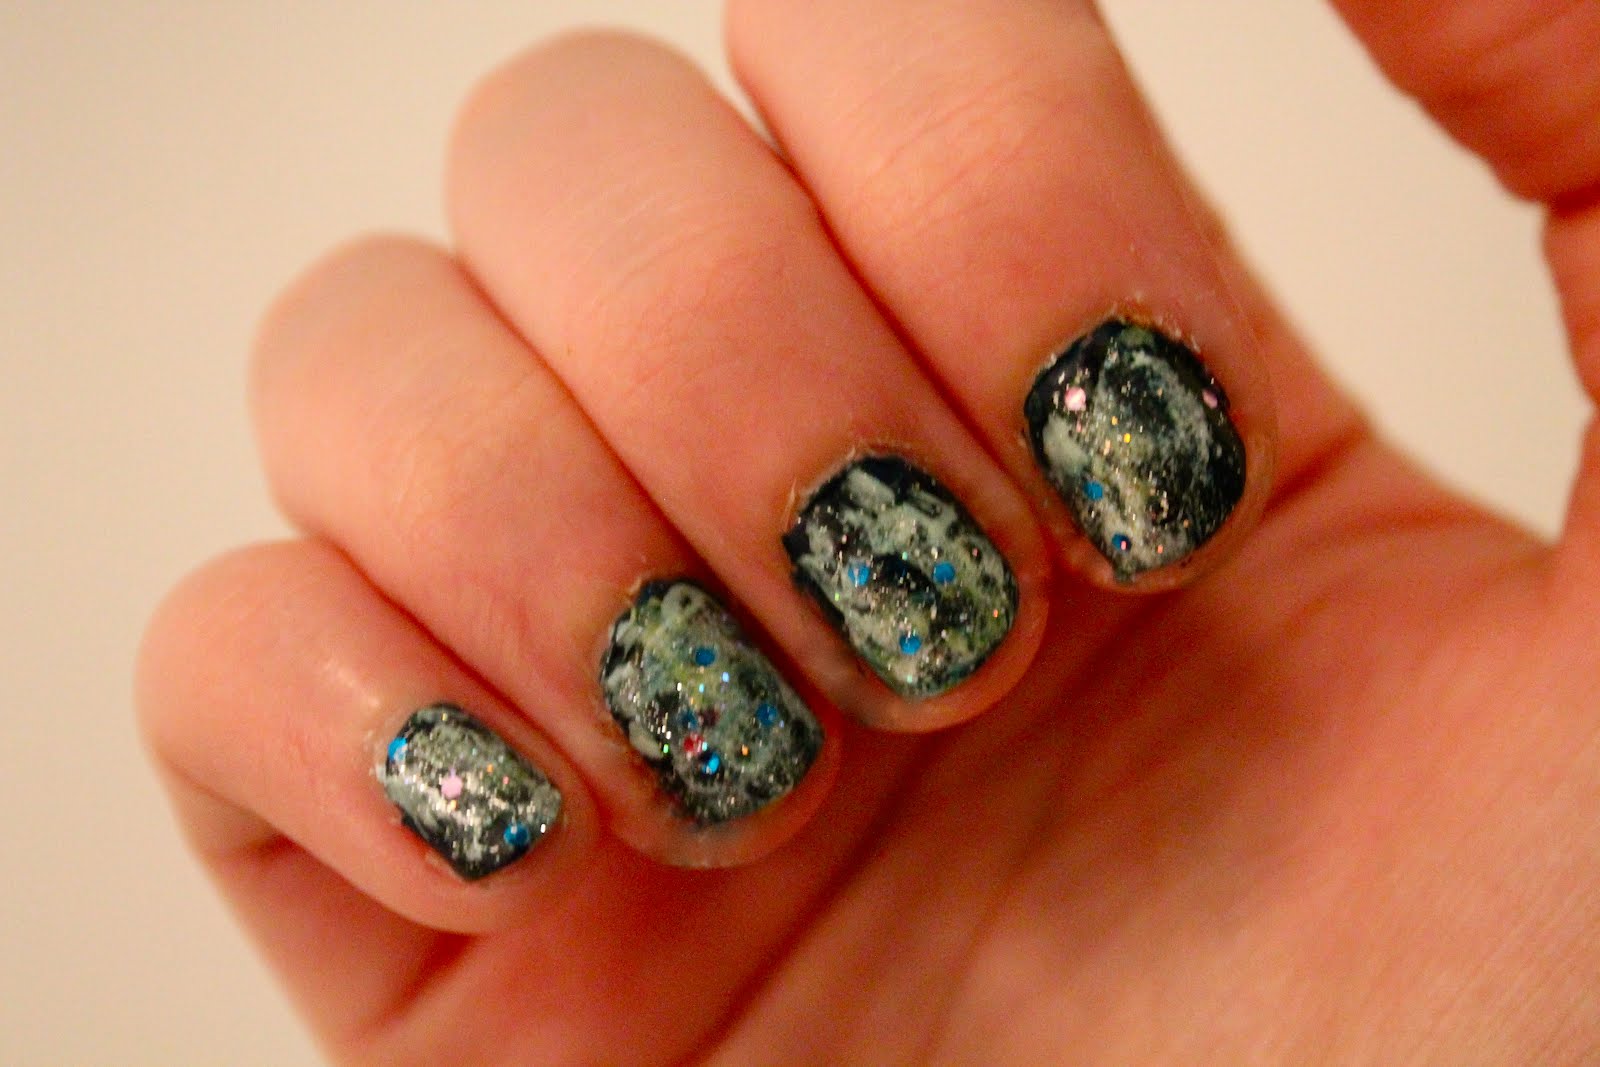
I've also seen a lot of cosmic nail designs floating around lately..so I decided to try it out myself.

I am nothing near a nail art professional..but here's what I came up with.


I first applied a dark navy blue..then piled on and blotted various lighter yellows, whites and mint greens. Then I applied a glittery coat and a topcoat.


I used NYC starry silver glitter, NYC west village, China Glaze re-fresh mint (my all time favorite polish and color btw), NYC french white tip, Sally Hansen flawless and Sally Hansen mellow yellow.


I apologize again for my anything but perfect nails. I consider myself to have "working hands" since I use them often and can't really have fancy nails for work. Being a rugby player doesn't help either..hehe. But I just love the design!


Saturday, February 25, 2012

Tutorial: Casting Resin


Want to preserve that butterfly you found in summer forever?! Or what about that bouquet of spring daisies? Well..there's casting resin for that.

Resin is pretty awesome. You can make jewelry, paperweights, or pretty much anything depending on the shape of the mold you have. It's basically making your own plastic.

I'm just going to warn you though..it's a very stinky process so make sure you do this in a well ventilated area! You really don't wanna inhale these fumes..haha.

You will need:

- canister of clear casting resin
- plastic measuring cups
- popsicle sticks (for stirring and mixing)
- single use paintbrush
- casting resin catalyst
- casting dyes
- newspaper or drop cloth (it gets messy)
- objects you want to embed
- casting mold

First you want to lay out your newspaper or drop cloth in the area you will be working because the stuff gets really messy and you don't want to ruin your lovely surface with sticky stinky resin.

Next take your mold. Fill the mold with water and then pour the water into one of the measuring cups. This will tell you how much resin you will need to fill the mold.

Then measure the amount of resin and pour it into the measuring cup. If you want to do multiple layers in your mold, you can measure in sections.

If you want to color your resin, add a few drops of dye. Usually the packaging will tell you how much to add, but I usually add from 3 to 5 drops depending on how much resin I have and how intense I want the pigment to be. Then stir your resin until the color is well blended.

Now you want to add your catalyst. It is recommended to add about 10 drops of catalyst per ounce. But be careful because too much catalyst will cause it to heat too quickly and crack, and not enough catalyst will result in a sticky resin. Mix the catalyst well.

Then you can pour your resin mixture into the mold. Let the mixture sit until it reaches a gel-like consistency when tapping with a popsicle stick or gently tipping the mold. It must reach this consistency before placing objects on top of it or adding the next layer, otherwise the layers might mix or the objects will sink into the layer.

Once it reaches the gel consistency, you can add your objects you want to embed. I used some sea shells, which have ridges and uneven surfaces. I painted them with a little bit of resin before adding them to the mold to prevent air bubbles from forming underneath them. Then you can place them gently in your mold.

You can create multiple layers with multiple objects and colors. I like to play around a bit.

Finally, you create the last layer of resin the same way you made every other layer, and you pour it on top until the mold is filled. When the top layer is completely hardened, you can pop out your resin and your creation is complete!

I've made multiple paperweights and jewelry charms..these make really great gifts!

My most recent creation is beach themed..embedded with seashells and the last layer contains beach sand.


It has three layers, the first layer has blue resin and seashells, the second has blue resin and a beach umbrella and the last has sand and yellow resin.


The back of the paperweight, containing sand. You can also glue a piece of felt to the back of your paperweight.


The front beach scene!

Also..this is my 100th post! Yaaay for Hearts of Trees having 100 posts!

I remember when I started this thing in 2009 so I could share my thoughts, inspiration and art with the world and I'm excited to keep sharing!

Thanks everyone! <3

Wednesday, September 22, 2010

Craft Idea: Cassette Pillow

I made this pillow for a friend who adores the 80's!


Unfortunately, my sewing machine was broken..so I handstitched the entire thing. I handcut every piece and embroidered the details.


The details are made from felt and the back of the pillow is a lilac polyester.


Friday, December 11, 2009

How to make fun-shaped bokeh!


Ever looked at a photo like the one above and thought "how did they do that?". No, it's not photoshop or any special effects. Believe it or not, the only materials you need to create this fun-shaped bokeh are construction paper of your choice and some tape.

This "filter" works best with large aperture lenses (I used a Canon 50mm F1.8)

1) Cut out a fake lens hood from the paper. Make sure it fits nice and tight around the lens.

2) Punch out or cut out the shape of your choice (ex. Heart) into the center of the filter.

OR

You can try this (it's a bit complicated but it's a little something I created):

Instead of cutting or punching out a shape, cut out a circle that is about an inch in diameter in the center of the filter. Then cut out two thin strips of paper about an inch and a half long each. Tape these two pieces on either side of the hole. It looks like this:


Then, cut out thicker strips of paper that are about 3 inches long, but make the ends not as thick so that they will be able to fit through the strips you just taped to the filter. In the center of the strips, cut out or punch out shapes of your choice. This way, you can have interchangeable shapes for your lens filter! The strips should look like this (I've cut out a heart and a snowflake):


You would attach the shape strips by sliding the ends under the taped strips on your filter. Make sure that the box containing the shape covers the entire circle cut out on your filter as to not let excess light in and possibly distort your shape. It should look like this when attached:


3) Then set your camera to the lowest aperture value...and shoot!

Enjoy!

Here are a few more images I've taken using this technique:


Friday, November 13, 2009

Hearts of Trees

I painted my laptop today. I decided to do a human heart design with a tree sprouting from the aorta and the superior vena cava. An then I added ranbow glitter paint over the entire painting. I finished it off by spraying it with clear glossy fixative.